How to grow Irises
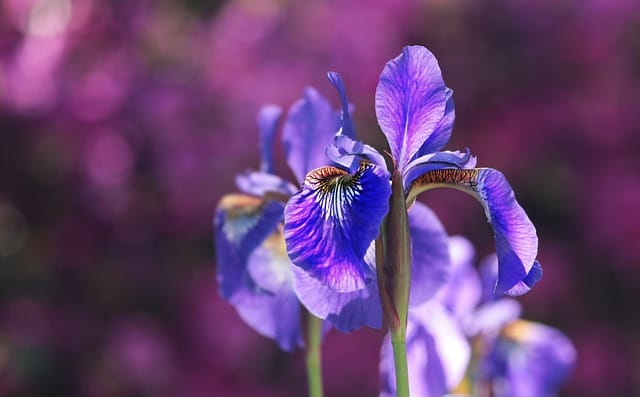
The iris is a popular flowering plant known for its beautiful and elegant blooms

In this article:
- Introduction to Irises
- Popular Varieties of Irises
- Climate and Growing Zones for Irises
- Selecting and Preparing the Planting Site
- Soil Preparation and Fertilization for Irises
- Planting Irises: Step-by-Step Guide
- Watering and Irrigation Tips for Irises
- Mulching Techniques for Irises
- Controlling Pests and Diseases in Irises
- Pruning and Deadheading Irises
- Dividing and Transplanting Irises
- Overwintering Irises: Tips for Cold Climates
- Propagating Irises: Methods and Tips
- Enjoying the Blooms: Harvesting and Arranging Irises
- Troubleshooting Common Issues with Irises
- Conclusion: Growing Beautiful Irises
Introduction to Irises
The iris is a popular flowering plant known for its beautiful and elegant blooms. It comes in a variety of colors and sizes, making it an attractive addition to any garden. Irises are easy to grow and maintain, making them a favorite among gardeners.
Popular Varieties of Irises
There are several popular varieties of irises to choose from, including bearded irises, Siberian irises, and Japanese irises. Each variety has its own unique features and requirements, so it's important to choose the one that best suits your preferences and growing conditions.
Climate and Growing Zones for Irises
Irises are known to thrive in temperate climates and are suitable for growing in USDA hardiness zones 3 to 10. However, different types of irises have specific climate requirements, so it's essential to choose a variety that is well-suited to your specific region.
Selecting and Preparing the Planting Site
When selecting a planting site for your irises, choose a location that receives at least six hours of direct sunlight per day. The soil should be well-draining and rich in organic matter. Prepare the planting site by removing any weeds or grass and loosening the soil to a depth of around 10 inches.
Soil Preparation and Fertilization for Irises
Irises prefer a slightly acidic to neutral soil pH level between 6.0 and 7.5. Test your soil to determine its pH level and make any necessary amendments to adjust it if needed. Adding organic matter, such as compost or well-rotted manure, to the soil will improve its fertility and drainage.
Planting Irises: Step-by-Step Guide
Planting irises is a straightforward process. Begin by digging a hole wide and deep enough to accommodate the iris rhizome or bulb. Place the rhizome or bulb into the hole, ensuring that the roots are spread out and covered with soil. Water the newly planted iris thoroughly.
Watering and Irrigation Tips for Irises
Iris plants require regular watering but should not be over-watered. Provide them with around an inch of water per week, either through rainfall or supplemental irrigation, especially during dry spells. However, avoid standing water or waterlogged soil, as this can lead to root rot.
Mulching Techniques for Irises
Applying a layer of organic mulch around iris plants can help conserve moisture, suppress weed growth, and regulate soil temperature. Use a mulch material such as straw, wood chips, or dried leaves. Apply the mulch in a layer about 2 to 3 inches thick, being careful not to bury the rhizomes or bulb.
Controlling Pests and Diseases in Irises
Irises are generally resistant to pests and diseases, but they can still be susceptible to certain issues. Common pests include iris borers and aphids, while diseases such as iris leaf spot and root rot can affect the plants. Regular inspection and proper sanitation practices can help prevent and control these problems.
Pruning and Deadheading Irises
Pruning irises is essential for maintaining their health and appearance. Remove any dead or damaged leaves and flowers regularly. Deadheading, or removing spent blooms, encourages the plant to produce more flowers. Cut the spent flower stalk back to the base of the plant to promote new growth.
Dividing and Transplanting Irises
Irises benefit from division every few years to rejuvenate the plants and prevent overcrowding. This process involves lifting the clumps, separating the rhizomes, and replanting them in a new location or spacing them out in the same bed. Dividing and transplanting irises should be done during their dormant period.
Overwintering Irises: Tips for Cold Climates
If you live in a region with harsh winters, it's important to protect your irises during the cold months. Apply a layer of mulch around the plants to insulate the soil and protect the rhizomes from freezing temperatures. Additionally, consider covering the plants with burlap or a frost blanket for added protection.
Propagating Irises: Methods and Tips
Irises can be propagated through various methods, including division, seed sowing, and rhizome or bulb offsets. Each method has its own requirements, and success rates may vary. Choose the propagation method that best suits your needs and follow the appropriate steps for successful propagation.
Enjoying the Blooms: Harvesting and Arranging Irises
Once your irises start blooming, you can harvest the flowers for indoor arrangements. Cut the stems at an angle and place them in a vase filled with water. Change the water every few days to keep the blooms fresh. Combine irises with other complementary flowers for stunning bouquets.
Troubleshooting Common Issues with Irises
Irises can face a range of common issues, such as yellowing leaves, lack of flowers, or stunted growth. These problems can be caused by various factors, including improper watering, nutrient deficiencies, or pest infestations. Proper diagnosis and appropriate corrective measures will help resolve these issues.
Conclusion: Growing Beautiful Irises
Growing irises is a rewarding endeavor that can add beauty and elegance to your garden. By understanding the specific needs and requirements of irises, you can ensure their successful growth and blooming. With proper care and maintenance, you can enjoy the stunning flowers of irises year after year.
