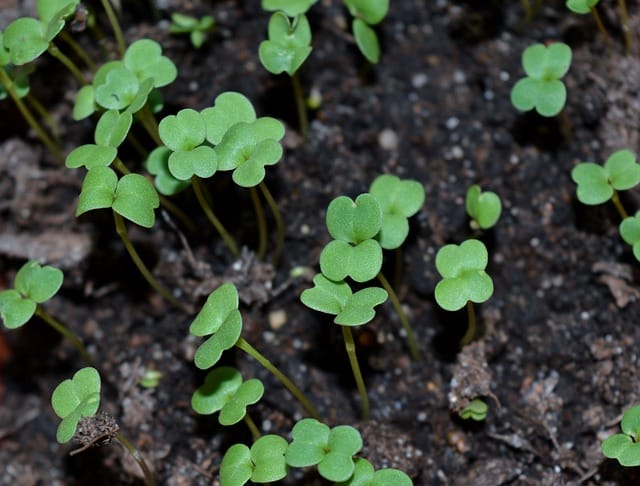
How to grow Microgreens
Microgreens are young vegetable greens that are harvested shortly after sprouting

In this article:
- Introduction to Microgreens
- Why Grow Microgreens?
- Choosing the Right Varieties
- Setting up the Ideal Growing Environment
- Sourcing Quality Seeds or Seedlings
- Preparing the Growing Medium
- Germination and Planting Techniques
- Watering and Drainage Guidelines
- Providing Adequate Lighting
- Temperature and Humidity Considerations
- Nutrient Requirement for Healthy Growth
- Managing Common Pests and Diseases
- Harvesting Techniques
- Post-Harvest Handling and Storage
- Creative Ways to Use Microgreens
- The Economics of Microgreen Farming
- Frequently Asked Questions about Microgreens
- Conclusion and Final Tips
Introduction to Microgreens
Microgreens are young vegetable greens that are harvested shortly after sprouting. They are packed with flavor and nutrition, making them a popular choice for health-conscious individuals.
Why Grow Microgreens?
Growing microgreens at home allows you to have a fresh supply of nutrient-rich greens year-round. They are easy to grow, require minimal space and resources, and can be harvested within a few weeks of planting.
Choosing the Right Varieties
Selecting the right varieties of microgreens is essential for a successful harvest. Consider factors such as taste, color, and growth rate when choosing your seeds. Some popular varieties include broccoli, spinach, radish, and kale.
Setting up the Ideal Growing Environment
To ensure optimal growth, microgreens need a well-ventilated area with good air circulation. Choose a location that receives sufficient sunlight or invest in a grow light system. Maintain a temperature between 60-75°F (15-24°C) and moderate humidity levels.
Sourcing Quality Seeds or Seedlings
Purchase high-quality seeds from a reputable supplier to ensure a healthy and successful crop. Alternatively, you can purchase seedlings from local nurseries or online stores.
Preparing the Growing Medium
Choose a growing medium that provides good drainage and moisture retention. Common options include soil-less mixes, coconut coir, or vermiculite. Fill a shallow tray or container with the growing medium, leaving about an inch of space at the top.
Germination and Planting Techniques
Pre-moisten the growing medium and spread the seeds evenly on the surface. Gently press the seeds into the medium, ensuring good seed-to-soil contact. Cover the tray with a humidity dome or plastic wrap to create a mini-greenhouse effect and aid in germination.
Watering and Drainage Guidelines
Water the microgreens carefully using a fine mist spray bottle to avoid dislodging the seeds or seedlings. Ensure that the growing medium is consistently moist but not waterlogged. Proper drainage is crucial to prevent root rot and other diseases.
Providing Adequate Lighting
If growing in a sunny area, ensure that the microgreens receive at least 4-6 hours of direct sunlight each day. If using artificial lights, position the grow lights about 2-4 inches above the plants and provide 12-16 hours of light per day.
Temperature and Humidity Considerations
Maintain a consistent temperature between 60-75°F (15-24°C) for optimal growth. Additionally, maintain moderate humidity levels of around 50-60% to prevent drying of the microgreens.
Nutrient Requirement for Healthy Growth
Microgreens require a balanced nutrient solution for healthy growth. You can use organic liquid fertilizers or hydroponic nutrients to provide essential minerals and micronutrients. Follow the recommended dilution rates and application instructions.
Managing Common Pests and Diseases
To prevent common pests and diseases, maintain good hygiene in your growing area. Monitor your microgreens regularly for signs of pests like aphids or fungal diseases like damping-off. Use organic pest control methods or natural remedies if necessary.
Harvesting Techniques
Microgreens are typically ready to harvest within 1-3 weeks, depending on the variety. Use a sharp pair of scissors or a clean knife to cut the greens just above the soil level. Harvest when the first true leaves have emerged for the best flavor and nutritional value.
Post-Harvest Handling and Storage
After harvesting, gently rinse the microgreens under cool water and pat them dry with a clean towel. Store them in a sealed container or a plastic bag lined with a paper towel in the refrigerator. Use them within a week to retain freshness.
Creative Ways to Use Microgreens
Microgreens can add flavor, texture, and visual appeal to a variety of dishes. Use them in salads, sandwiches, wraps, smoothies, or as a garnish on soups or main courses. Get creative in the kitchen and experiment with different combinations.
The Economics of Microgreen Farming
Microgreen farming can be a profitable venture with high demand in local markets, restaurants, and health food stores. Research your target market, calculate costs, and consider the potential revenue before starting a microgreen business.
Frequently Asked Questions about Microgreens
Q: How long do microgreens take to grow?
A: Microgreens typically take 1-3 weeks to reach harvest stage, depending on the variety.
Conclusion and Final Tips
Growing microgreens can be a rewarding and enjoyable experience. With a little knowledge and some practice, you can enjoy a fresh supply of nutritious greens throughout the year. Remember to experiment, learn from your experiences, and have fun!
