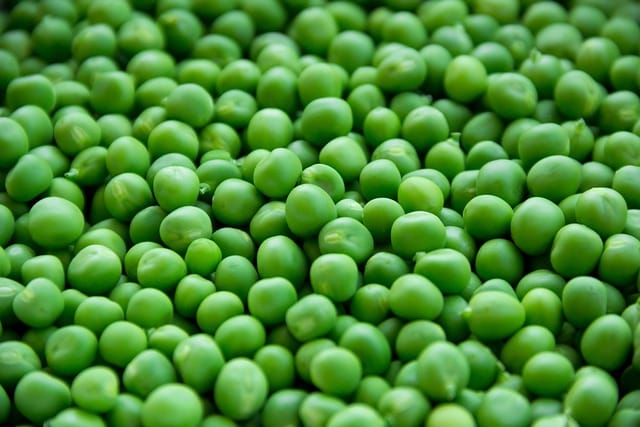
How to grow Peas
Growing peas in your garden is a rewarding experience

In this article:
- Introduction
- Choosing the right variety
- Preparing the soil
- Planting the seeds
- Providing adequate sunlight
- Watering and irrigation techniques
- Fertilizing for optimal growth
- Supporting the plants
- Controlling pests and diseases
- Harvesting the peas
- Storing and preserving the harvest
- Troubleshooting common issues
- Tips for successful pea cultivation
- Conclusion
Introduction
Growing peas in your garden is a rewarding experience. The sweet and tender pods make an excellent addition to any meal. In this article, we will guide you through the step-by-step process of growing peas from choosing the right variety to troubleshooting common issues. Follow these tips and cultivate a successful pea harvest.
Choosing the right variety
When selecting a pea variety, consider your climate, available space, and intended use. There are three main types of peas: garden peas, snow peas, and snap peas. Garden peas are harvested when the pods are fully formed and the peas inside are plump. Snow peas are harvested when the pods are flat and the peas inside are barely developed. Snap peas have edible pods and plump peas. Choose the variety that suits your preferences and gardening conditions.
Preparing the soil
Peas thrive in well-draining soil rich in organic matter. Before planting, ensure that the soil is loose and free of debris. Incorporate compost or well-decomposed manure to provide essential nutrients. Avoid planting peas where they have grown in the past two years, as this can increase the risk of disease.
Planting the seeds
Sow the pea seeds in early spring, as soon as the soil can be worked. Plant them 1-2 inches deep and 2-3 inches apart, with rows spaced about 12 inches apart. Ensure that the seeds are planted with the pointed end facing downwards. If you live in a warmer climate, start the seeds indoors and transplant them outside once the weather cools down.
Providing adequate sunlight
Peas require full sun for optimal growth. Choose a location in your garden that receives at least 6-8 hours of direct sunlight per day. Lack of sunlight can lead to poor growth and lower yields.
Watering and irrigation techniques
Keep the soil consistently moist, but not waterlogged, throughout the growing season. Water deeply once or twice a week, depending on weather conditions. Avoid overhead watering, as it can promote diseases. Consider using drip irrigation or soaker hoses to deliver water directly to the roots, minimizing water loss.
Fertilizing for optimal growth
Peas benefit from a balanced fertilizer application. Before planting, incorporate a slow-release fertilizer into the soil. Once the plants begin to flower, side-dress them with a nitrogen-rich fertilizer to promote healthy pod development. Avoid over-fertilizing, as it can lead to excessive foliage growth at the expense of pea production.
Supporting the plants
As the pea plants grow, they will need support to prevent them from falling over. Install trellises or stakes in the ground to create a framework for the plants to climb. Ensure that the support structure is sturdy enough to bear the weight of the plants when they are mature.
Controlling pests and diseases
Monitor your pea plants regularly for common pests such as aphids, pea weevils, and caterpillars. Use organic or chemical insecticides as necessary to control infestations. Diseases such as powdery mildew and root rot can also affect peas. Practice good garden hygiene, providing adequate spacing between plants to promote air circulation and prevent disease spread.
Harvesting the peas
Harvest your peas when the pods are plump and full. Garden peas should be picked just as the peas are about to reach their full size. Snow peas are harvested when the pods are flat, and the peas inside are barely visible. Snap peas should be harvested when the pods are still tender, and the peas inside are well-formed. Use scissors or your fingers to harvest the pods carefully, ensuring not to damage the plants.
Storing and preserving the harvest
Peas are best eaten fresh, but if you have a surplus, they can be stored in the refrigerator for up to one week. Blanch and freeze excess peas to enjoy them throughout the year. Place the peas in boiling water for a few minutes, then transfer them to an ice bath. Once cool, drain and pack them in airtight containers or freezer bags.
Troubleshooting common issues
Common issues faced when growing peas include poor germination, yellowing leaves, or stunted growth. Poor germination can be due to planting in cold soil or using old seeds. Yellowing leaves may indicate a nutrient deficiency, particularly nitrogen. Stunted growth can be caused by compacted soil or lack of sunlight. Address these issues by providing the appropriate conditions for your pea plants.
Tips for successful pea cultivation
- Rotate your pea crops every year to prevent disease buildup.
- Plant companion plants such as carrots or lettuce to maximize space utilization.
- Mulch around the base of the plants to conserve moisture and suppress weed growth.
- Remove any weeds that compete with the pea plants for nutrients and water.
- Keep an eye out for signs of pests or diseases and take action promptly.
Conclusion
Growing peas can be a satisfying and enjoyable experience. By following the steps outlined in this guide, you can cultivate healthy pea plants, rich in flavor and nutrients. Remember to choose the right variety, prepare the soil, provide adequate sunlight, water and fertilize appropriately, support the plants, control pests and diseases, and harvest and store your pea harvest properly. With proper care, you will soon be enjoying a bountiful harvest of delicious peas from your garden.
