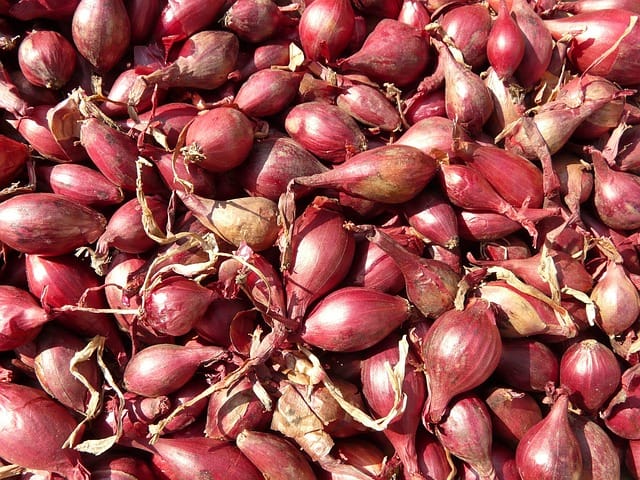
How to grow Shallots
Shallots are a versatile and flavorful vegetable that can be grown in your home garden

In this article:
- Introduction
- Choosing the Right Shallot Variety
- Preparing the Soil
- Planting Shallot Bulbs
- Watering and Fertilizing
- Mulching and Weed Control
- Pruning and Thinning
- Protecting Shallots from Pests and Diseases
- Harvesting Shallots
- Curing and Storing Shallots
- Troubleshooting Common Issues
- Delicious Shallot Recipes to Try
- Conclusion
Introduction
Shallots are a versatile and flavorful vegetable that can be grown in your home garden. They belong to the allium family, which also includes onions and garlic. Shallots have a milder and sweeter flavor compared to onions, making them a popular choice for many cuisines around the world. They are easy to grow and require minimal maintenance, making them a perfect addition to any garden.
Choosing the Right Shallot Variety
Before starting your shallot growing journey, it is important to choose the right variety. Shallots come in various sizes and colors, each with its own distinct flavor. Some popular shallot varieties include French Red, Dutch Yellow, and Grey Shallots. Consider your local climate and soil conditions when selecting the variety, as some varieties may perform better in certain regions.
Preparing the Soil
Shallots thrive in well-draining soil that is rich in organic matter. Begin by removing any weeds or debris from the planting area. Loosen the soil using a garden fork or tiller and incorporate compost or well-rotted manure to improve its fertility and structure. Shallots prefer a slightly acidic soil with a pH around 6.0-6.5. A soil test can help determine the pH level and any necessary amendments.
Planting Shallot Bulbs
Shallots are typically grown from sets or bulbs, which are small individual shallots with a root plate attached. Plant your shallot bulbs in early spring or fall, depending on your climate. Dig shallow trenches about 1 inch deep and space the bulbs 6-8 inches apart. Place the bulbs with the root plate facing downward and cover them with soil. Water thoroughly after planting.
Watering and Fertilizing
Shallots require consistent moisture throughout the growing season. Water deeply when the top inch of soil feels dry, but avoid overwatering as it can lead to rotting. A layer of organic mulch can help retain moisture and regulate soil temperature. Fertilize the plants with a balanced organic fertilizer at planting time and again when the leaves start to emerge. Follow the manufacturer's instructions for application rates.
Mulching and Weed Control
Mulching is essential to suppress weed growth and conserve soil moisture. Apply a layer of organic mulch, such as straw or shredded leaves, around the plants, leaving a few inches of space around the stems. This will help to smother weeds and prevent competition for nutrients. Regularly inspect the beds and remove any weeds that manage to grow through the mulch.
Pruning and Thinning
Pruning and thinning shallots are important for proper growth and development. Remove any yellowing or diseased leaves to prevent the spread of diseases. Thinning involves removing excess plants to provide adequate space for the remaining ones to grow. Thin the shallot bed when the plants are at least 6 inches tall, leaving about 4-6 inches of space between each plant.
Protecting Shallots from Pests and Diseases
Shallots are generally resistant to most pests and diseases. However, some common issues to watch out for include onion maggots, fungal diseases, and thrips. To protect shallots from pests, consider using floating row covers or netting. Avoid planting shallots in areas previously affected by onion-related diseases. Proper crop rotation and good garden hygiene are essential in preventing the occurrence of pests and diseases.
Harvesting Shallots
Shallots are usually ready for harvest when the foliage begins to dry and turn brown. Use a garden fork or shovel to carefully lift the bulbs from the soil. Handle them gently to avoid bruising or damaging the bulbs. Allow the shallots to dry on the ground for a few days, or move them to a well-ventilated area to cure.
Curing and Storing Shallots
After harvesting, it is important to cure the shallots to extend their storage life. This process involves drying the bulbs in a well-ventilated area with low humidity and temperatures around 70-80°F. Spread the shallots in a single layer on screens or trays, allowing good air circulation. After a few weeks, the shallots will be fully cured and can be stored in a cool, dry place for several months.
Troubleshooting Common Issues
While shallots are relatively easy to grow, they may encounter some problems along the way. Common issues include yellowing leaves, bulb rot, and pests. Conduct a thorough inspection of your plants regularly and address any issues promptly. Most problems can be avoided with proper care and attention to growing conditions.
Delicious Shallot Recipes to Try
Shallots add a delightful flavor to various dishes. Here are a few delicious recipes to try:
- Roasted Shallot and Balsamic Vinaigrette Salad
- Shallot and Thyme Roasted Chicken
- Grilled Vegetables with Shallot Butter
- Caramelized Shallot and Goat Cheese Tart
- Shallot and Herb Couscous
Conclusion
Growing shallots can be a rewarding experience for any home gardener. With the right variety, proper soil preparation, and regular maintenance, you can enjoy a bountiful harvest of these flavorful vegetables. Follow the steps outlined in this guide, and soon you'll be preparing delicious dishes using your own homegrown shallots.
